This guide walks you through exporting inventory and product data from Spruce and uploading it to Catalyst for processing.
Prerequisites
- Access to the Spruce POS system with permissions to run reports
- A custom inventory export report (e.g., IN_INVENTORY_EXPORT) already configured in your system. If this report has not been set up, contact the Spruce support team first (see contact info at the bottom of this article).
- Access to Notepad (or another plain text editor)
- A Catalyst account for uploading the export
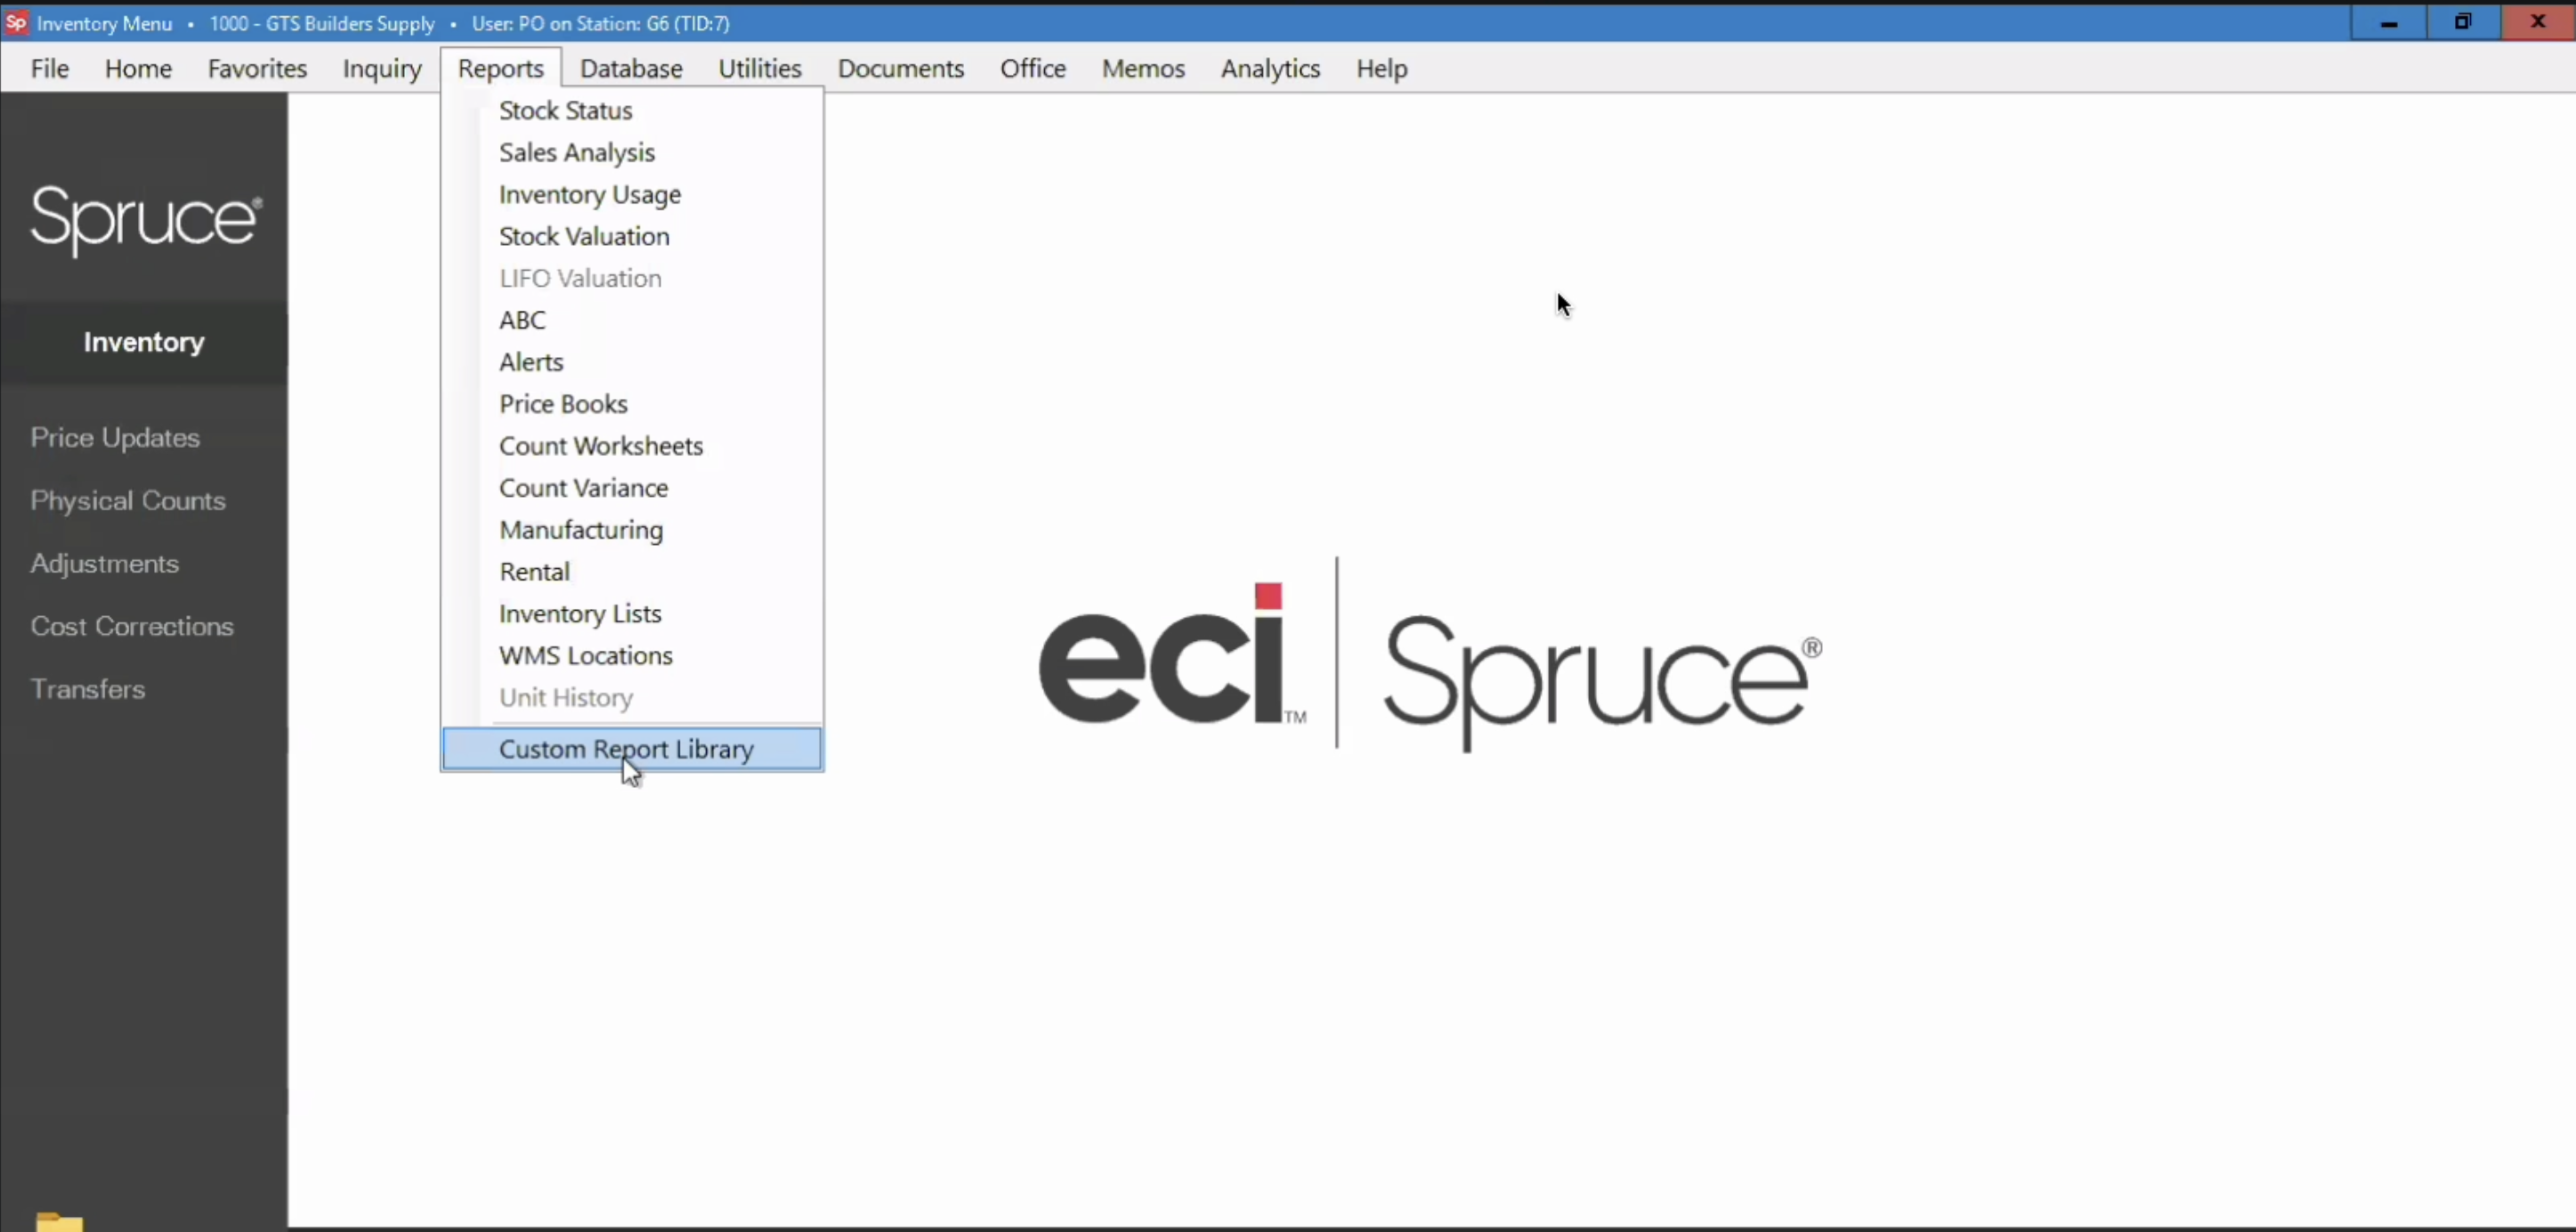
Step 1: Open the Custom Report Library
In Spruce, navigate to the top menu bar and click Reports, then select Custom Report Library from the dropdown menu.
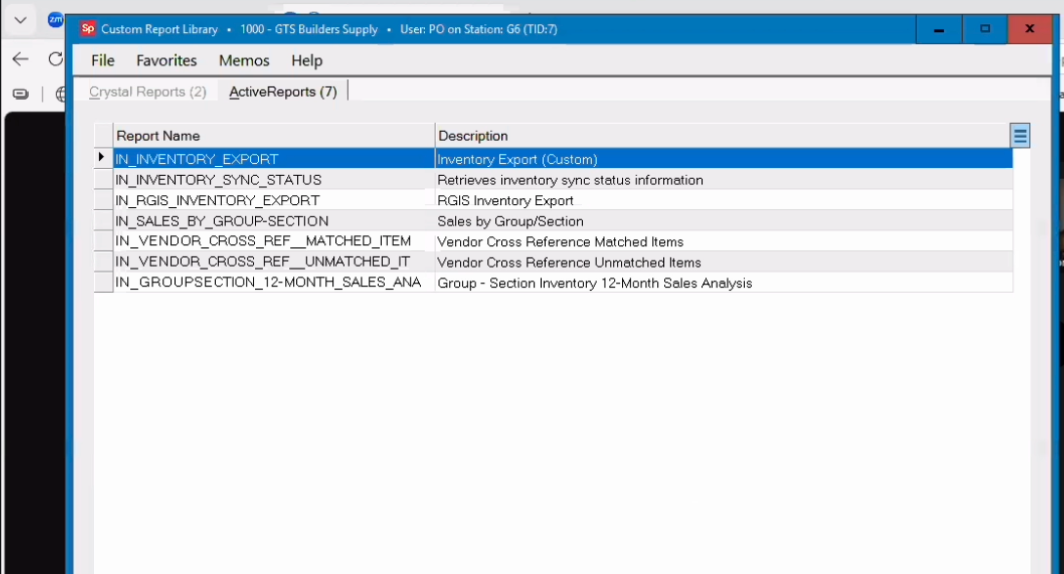
Step 2: Locate the Inventory Export Report
In the Custom Report Library window, click the ActiveReports tab.
Locate the inventory export report. Common report names include IN_INVENTORY_EXPORT and IN_Inventory_Export_With_Retail, though yours may differ.
Note: This is a custom report that must be added by the Spruce support team. If you do not see an inventory export report, contact Spruce at Service@GetSpruce.com or visit getspruce.com/contact to have one configured.
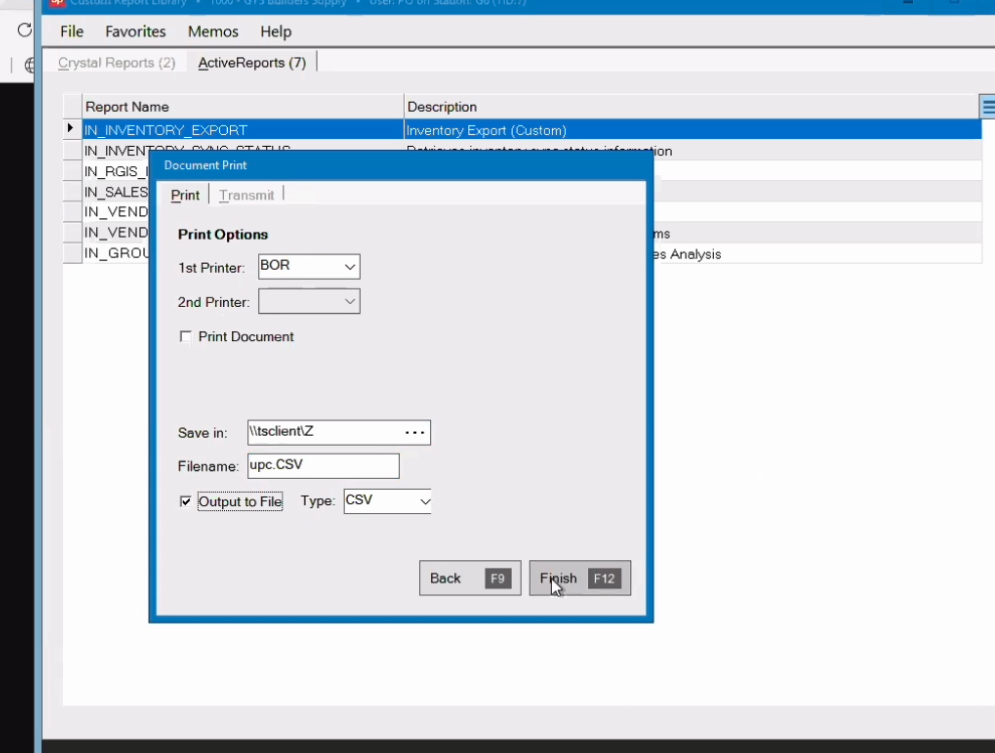
Step 3: Click Print
With the report selected, click the Print button located on the bottom toolbar of the Custom Report Library window (between Preview and Cancel in the function key bar).
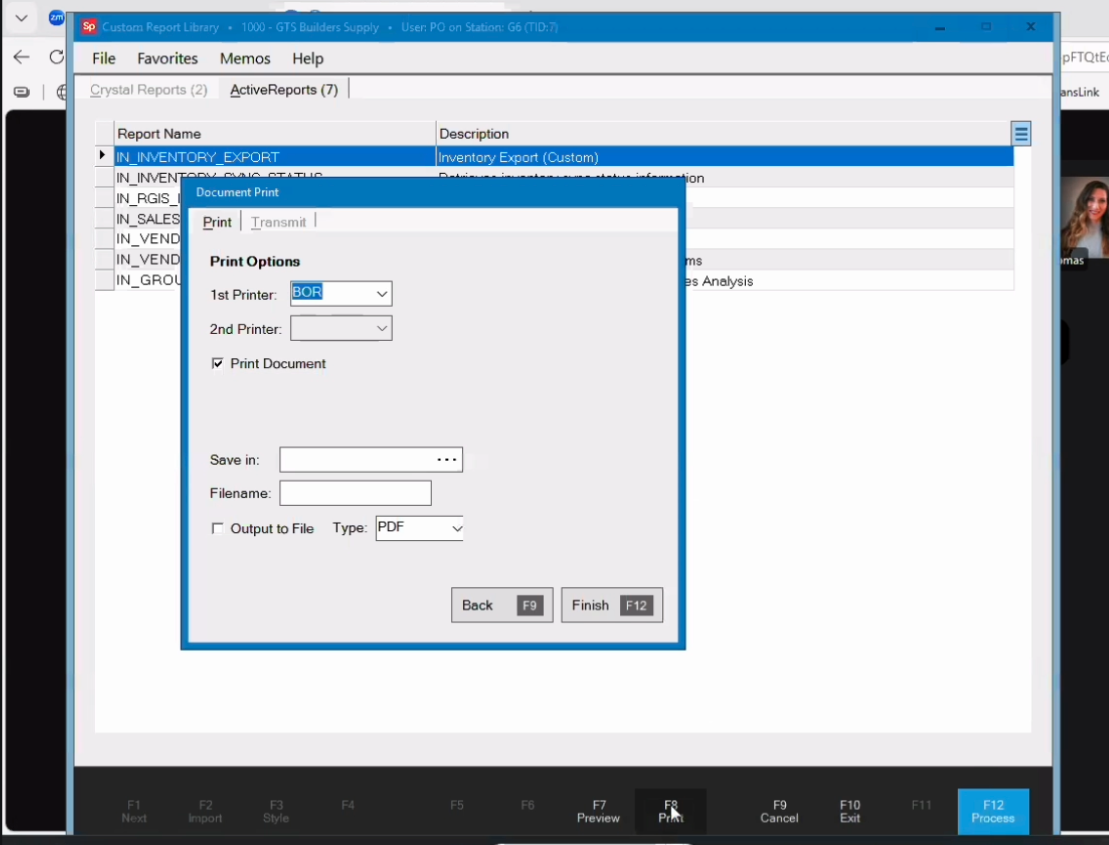
Step 4: Configure the File Output
In the Document Print dialog that appears:
- Check the Output to File checkbox.
- In the Save in field, browse to your desired save location (Desktop, Downloads, or any easily accessible folder).
- In the Filename field, enter a name for the file. The preferred filename is nmr_inventory.csv, but this is not required.
- Set the Type dropdown to CSV.
- Click Finish (or press F12).
A Report Parameters dialog will appear again. Select the Branch one more time and click OK.
Step 5: Open the File in Notepad
Navigate to the folder where you saved the CSV file.
Right-click the file and select Edit in Notepad (or Open with → Notepad).
⚠ IMPORTANT: Do NOT open the file in Excel. Saving a CSV file in Excel can cause unpredictable formatting errors (such as stripping leading zeros from UPCs or converting long numbers to scientific notation) that are very difficult to diagnose.
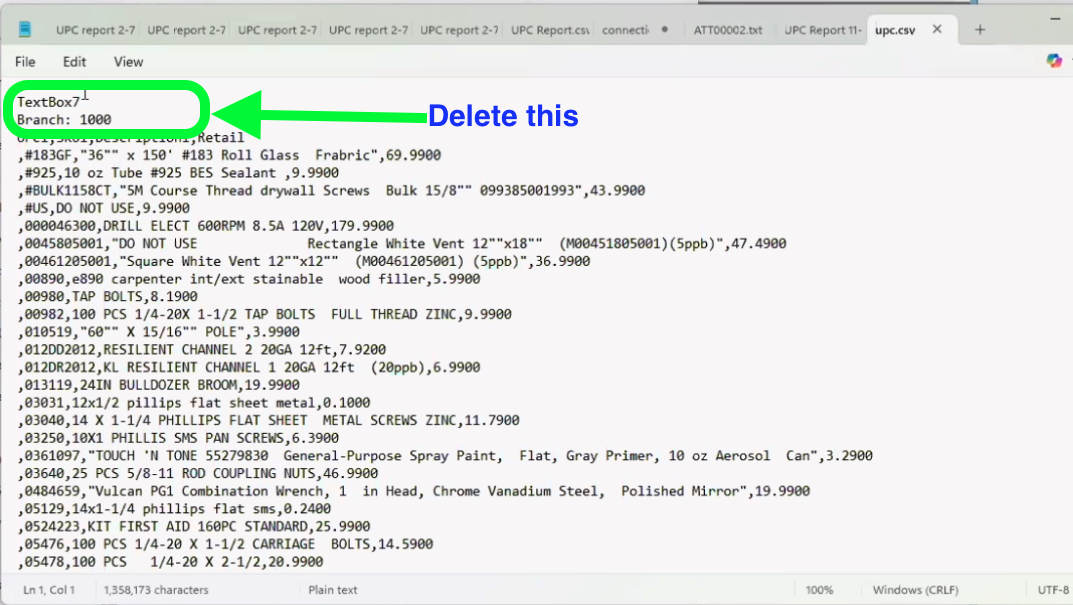
Step 6: Clean Up the File Header
In Notepad, delete any extra rows at the top of the file that appear above the actual column headers.
For example, rows like "TextBox7" and "Branch: 1000" should be removed.
The first row of the file should be the actual column headers (e.g., UPC1, SKU1, Description1, Retail). Since these are custom reports, your column headers may differ.
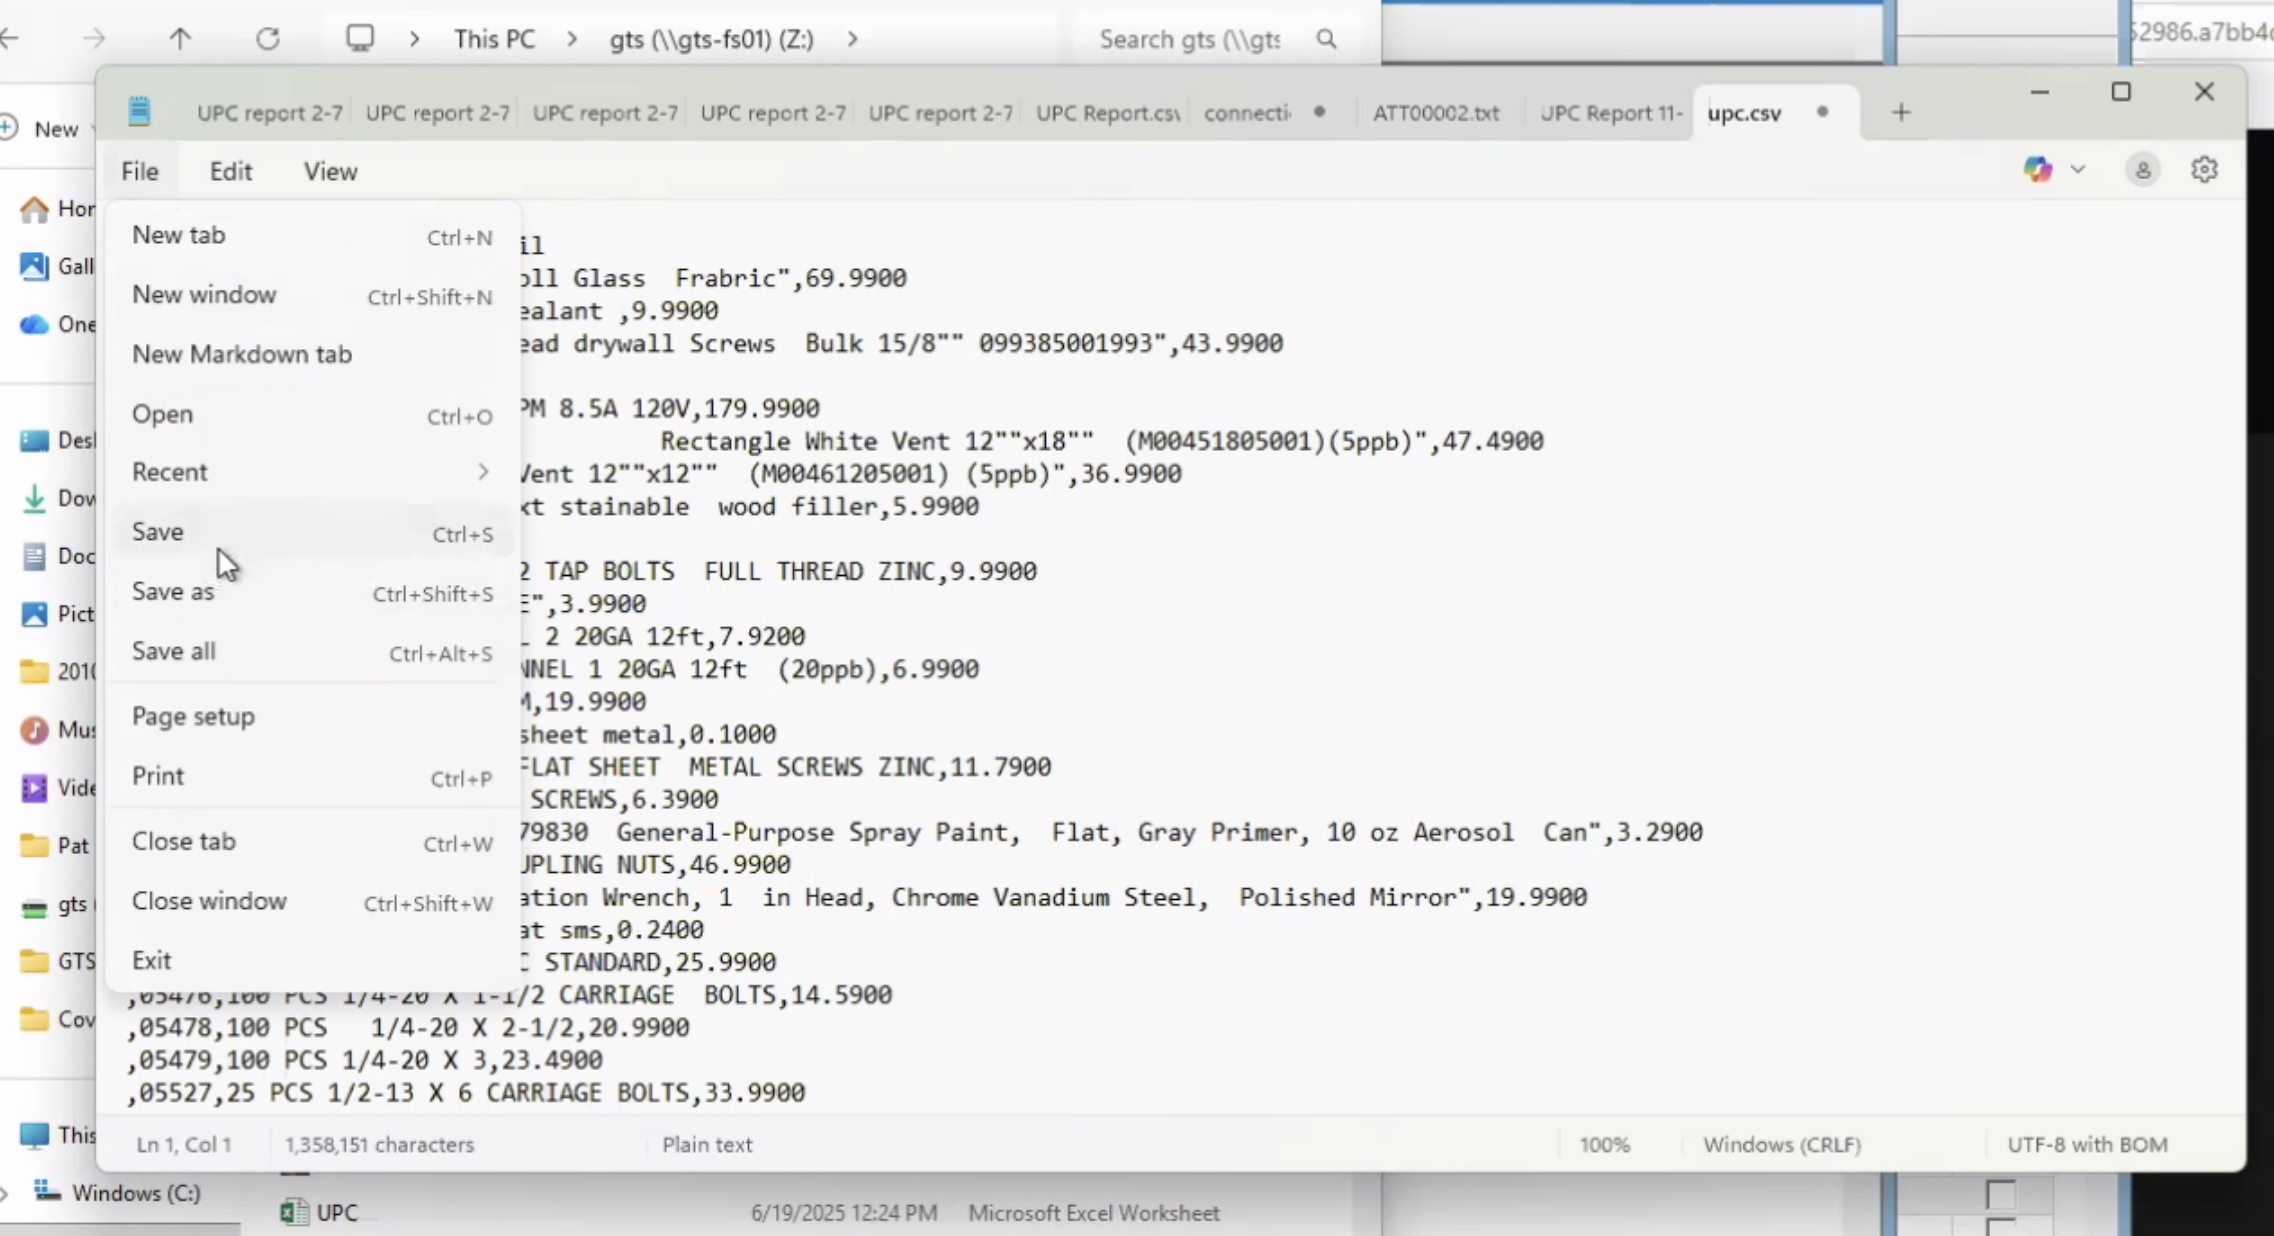
Step 7: Save the Cleaned File
Click File → Save (or press Ctrl+S) in Notepad.
This will overwrite the original file with the cleaned version that now starts with the proper CSV column headers.
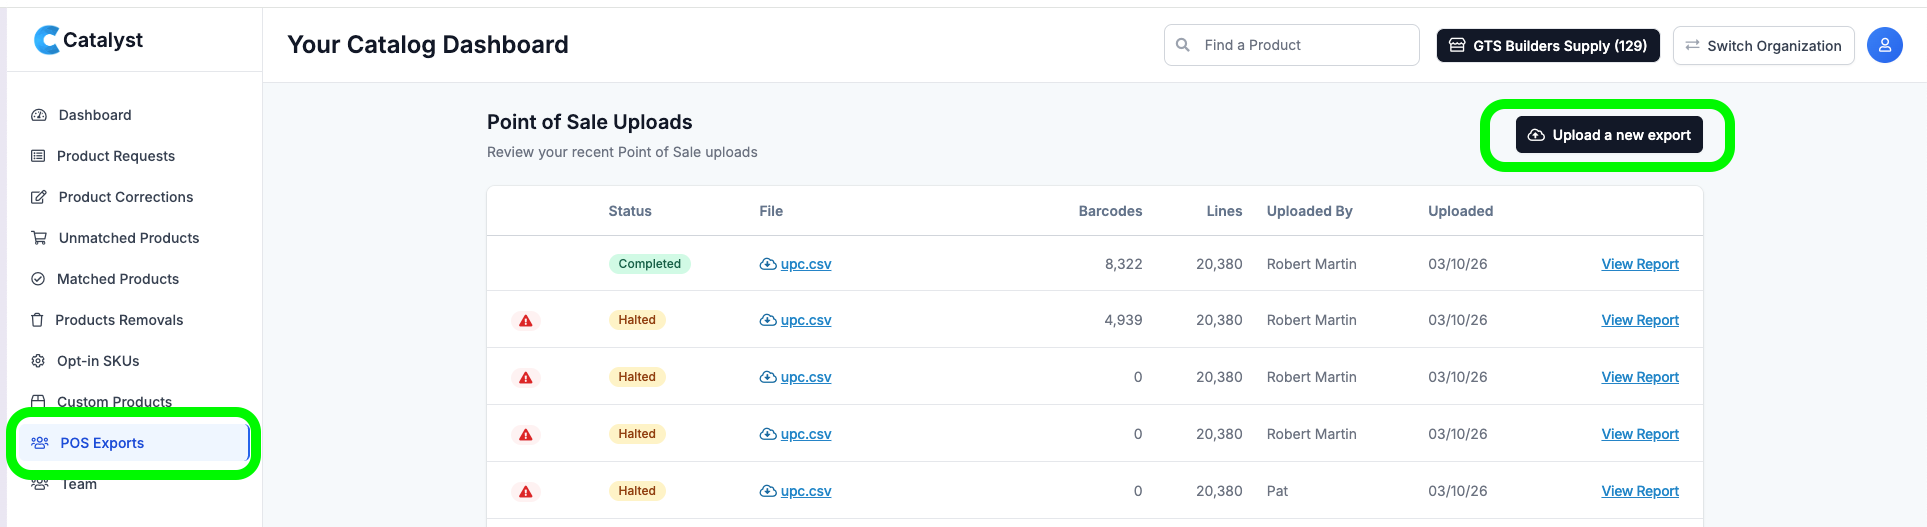
Step 8: Upload to Catalyst
Log into the Catalyst dashboard.
In the left sidebar, click POS Exports.
Click the Upload a new export button in the top-right corner of the page.
Select your cleaned CSV file and upload it for processing.
Troubleshooting
If you encounter any unexpected issues during the export or upload process, submit a support ticket at:
https://local.newmediaretailer.com/engage/requests/create
If you attempted to upload the CSV file before submitting your ticket, the support team will be able to access the file you tried to upload and help diagnose what went wrong.
Spruce Support Contact Info
Email: Service@GetSpruce.com
Website: getspruce.com/contact
Was this article helpful?
That’s Great!
Thank you for your feedback
Sorry! We couldn't be helpful
Thank you for your feedback
Feedback sent
We appreciate your effort and will try to fix the article